
| ☰ See All Chapters |
Selenium WebDriver Setup in Eclipse
There is no WebDriver software or any WebDriver application to install, but there is some prerequisite software installations needed to use selenium WebDriver. Below are two important setup should be ready to use selenium WebDriver.
Install Java 8 or higher version installation.
Set path in environment variables
Eclipse setup or any Java IDE of your interest.
After these important installations there is no much setup needed. In the next tutorial of Selenium web driver first test case example you will learn the steps to create the sample.
Step 1: Install JDK (Java Development Kit)
Download the JDK from below link and install the software in your system.
https://www.oracle.com/technetwork/java/javase/downloads/index.html
Step 2: Set path in environment variables
Why we need to set path?
When we set the path, we can compile and execute java programs by keeping java files in our desired folder structures. If path is not set, then to execute programs we have to keep java files in a folder where java compiler (javac.exe) is present. We should not disturb the java development kit installation environment by keeping our program files.
How to set path?
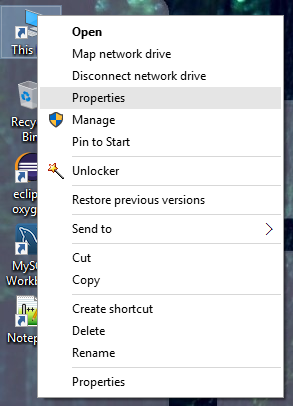
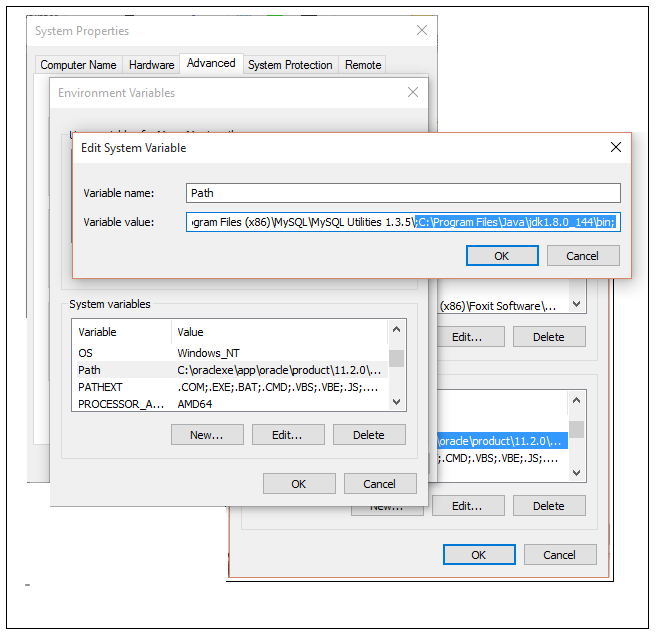
1. Right click on Computer (Windows 7)/ This PC (Windows 10) , select Properties
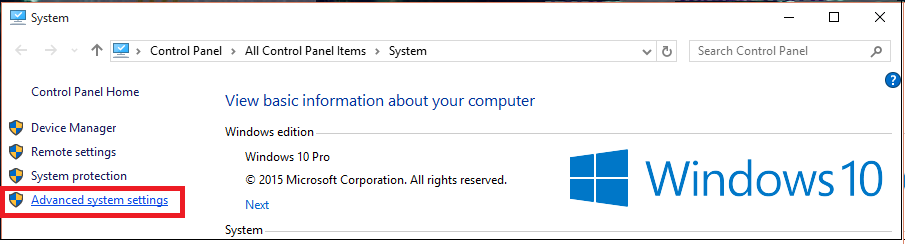
2. Click on “Advanced System Settings”
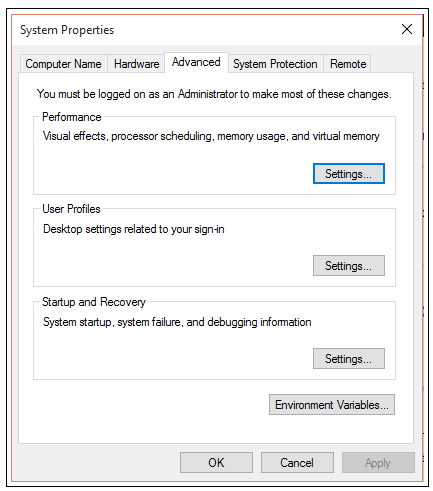
3. Click on Environment Variables
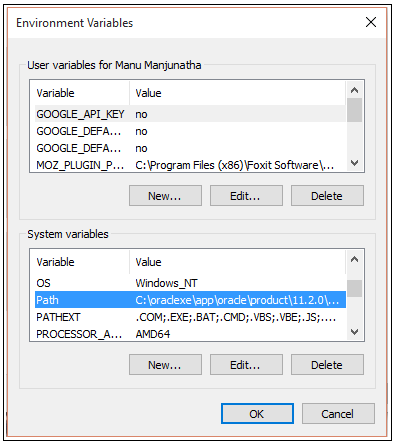
4. In System Variables double click on path variable. To the existing value append semicolon then append path of bin folder. Finally click on OK.
→ Variable name: path
→ Variable value: <whatever present before>;C:\Program Files\Java\jdk1.8.0_144\bin;
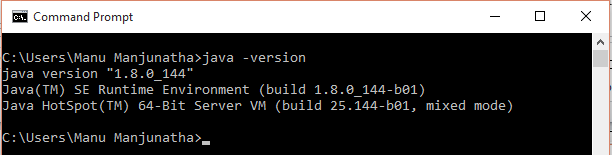
Once java path is set open command prompt and type “java –version”, we should see java version. If you get the error as “java is not recognized as an internal or external command, operable program or batch file” then java is not installed in your system.
Step 3: Setup Eclipse and workspace
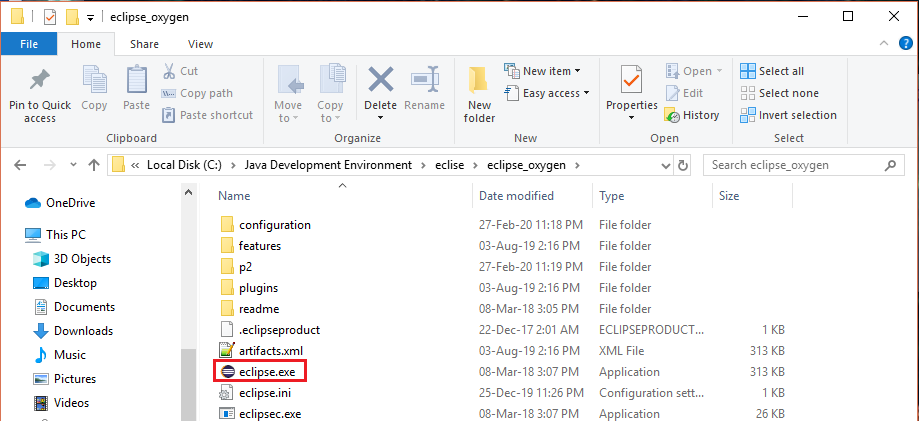
1. Download Eclipse IDE for java from Eclipse Website. You will get it in zip file format. Unzip it to get the executable files. This software is not required to install in OS, it is like portable software. Launch eclipse by clicking on "eclipse.exe" which will be available inside the unzipped folder.
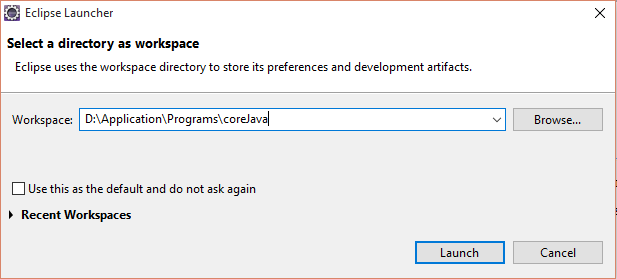
2. When eclipse is opened, it asks for a workspace folder. Give your preferred location and press "ok". This workspace folder will be used by eclipse to save all our project work.
After eclipse is launched
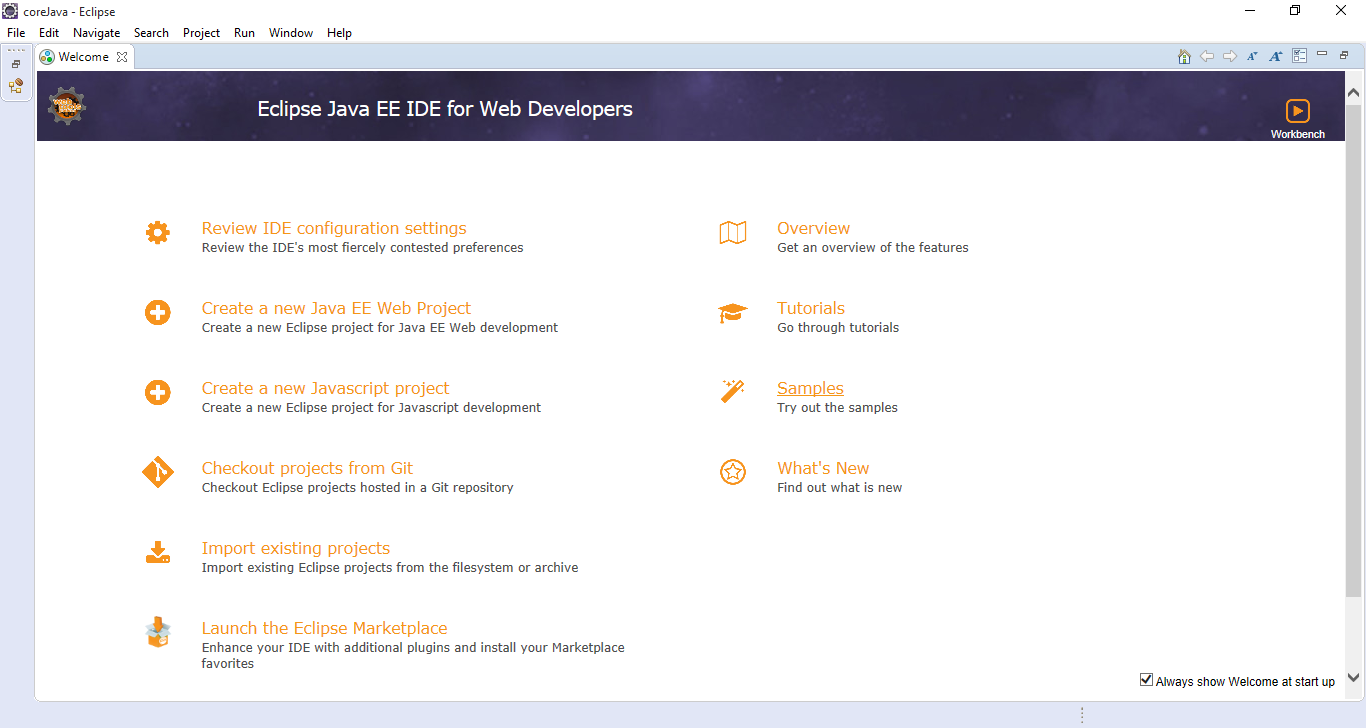
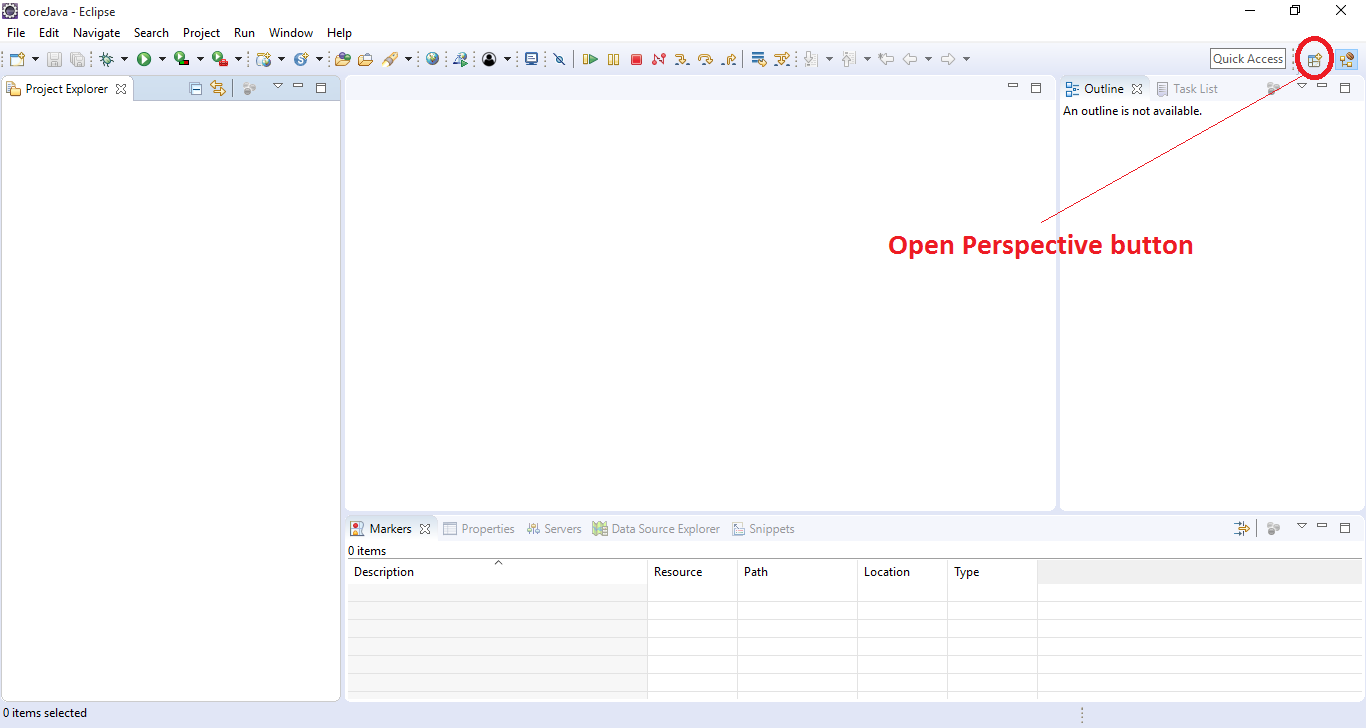
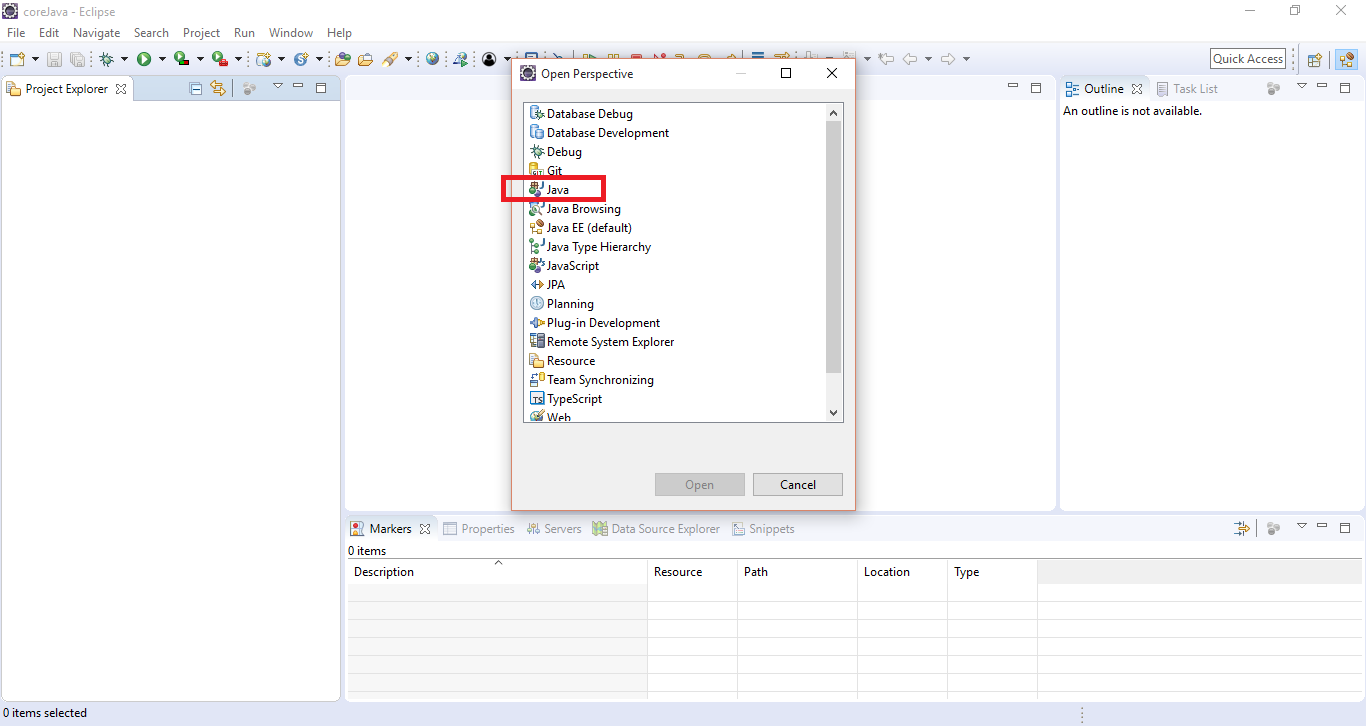
3. Close welcome window, it is better to unselect “Always show Welcome at start up” option at right bottom corner. Click on Open Perspective button and select Java option.
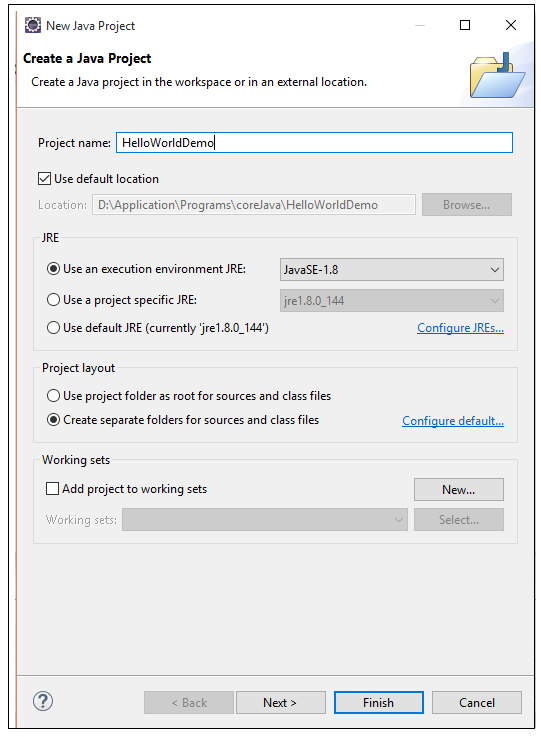
4. Select File -> New -> Project -> Java Project -> Next
Enter the project name; our project name is “HelloWorldDemo”, then click finish
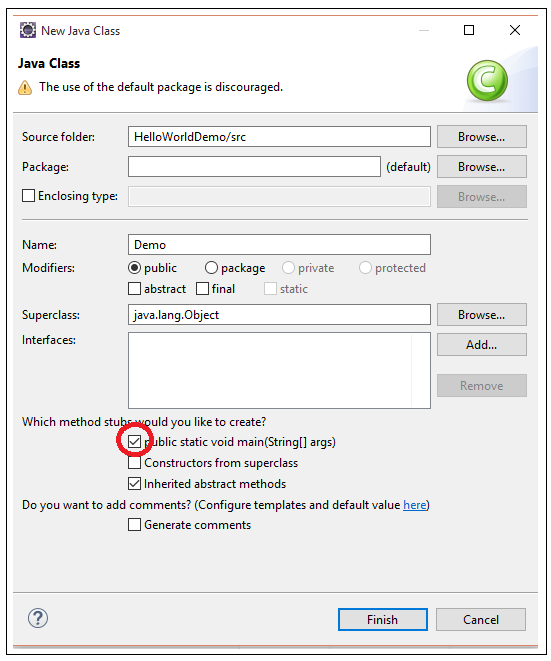
5. Right click on the project select New -> Class

Enter the Class Name. Our class name is "Demo".
Check the checkbox "public static void main (String args)"
Click on "Finish"
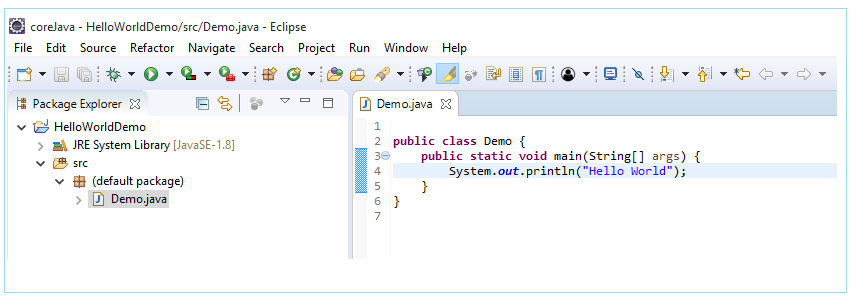
6. Write your program, we are adding a simple statement to write a message “Hello World” on console. After the changes, save the file (Press Ctrl+S)
public class Demo {
public static void main(String[] args) {
System.out.println("Hello World");
}
}
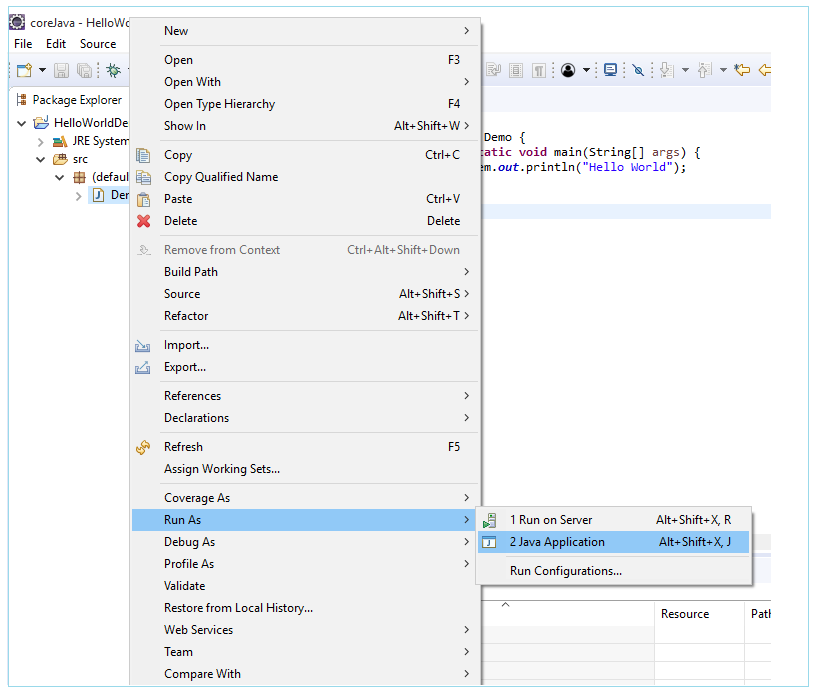
7. To run program, Right Click on your java file (Demo.java in our case), select -> "Run As" -> "Java Application"
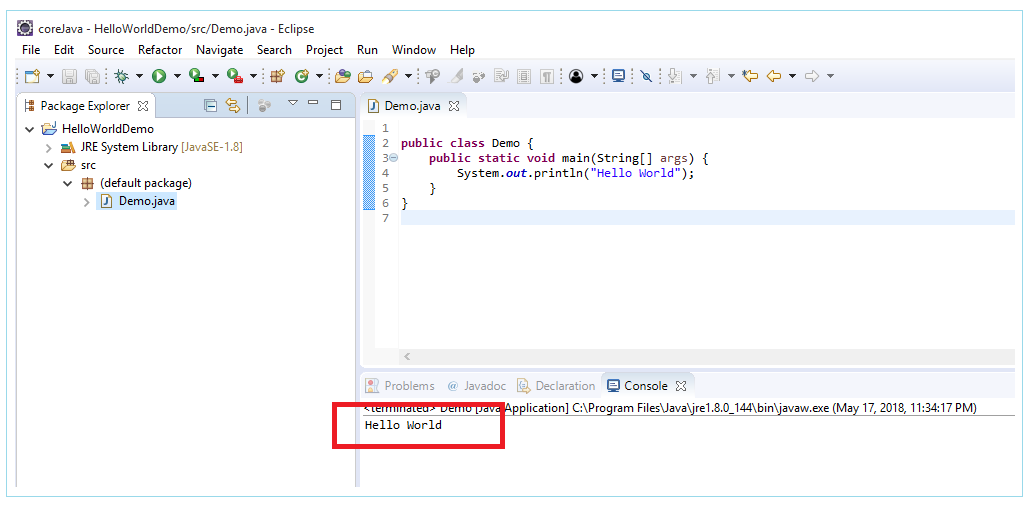
Check the output on console
All Chapters
